Well while doing the tutorial on both styles of animation in Rotoscoping I have realised that my skills are not far of real job advert but still I am have a long way to go before I am on a professional level, I feel will need a lot of consistency with a lot of practice. Rotoscoping is relatively easy depending on the amount being Rotoscoped the animation is a lot easier to be consistent because you are tracing or key framing in front of live image but also make it more harder as you must be very accurate with placement of your animation. I enjoyed the technique and appreciated the challenge of Rotoscoping. The 2D animation was harder but more enjoyable as if I was asked about a preference I would say 2D animation is the area of design I would like to focus on. The 3D animation was a lot more technical as you are animating a lot more components making it more easy to not show accuracy in what your Rotoscoping over but was still was a good challenge. In this unit the option of screen shots or video was given to us, I decided to do screen shots what are easier to complete but I would say doing a video would of been easier especially if you know what your doing. If something was not explained properly under a screen shot you, as the follower would be lost cause it is a still image instead of a flowing video but still like the idea of screen shots.
Friday, 1 April 2011
Wednesday, 30 March 2011
After Effects/ Maya
So Now I will show you a step by step of how to set up your self to rotoscope using a 3D software in ths case Maya.


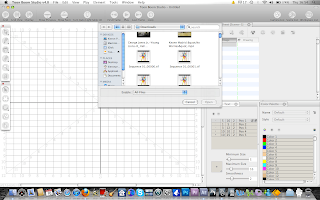
Open After Effects
 Click on 'File' scroll down to were it say's 'Import' another drop down box will appear go across and click 'File' it will open your files find you video and click on the video then press 'Open'.


You should now see your video has been Imported.

Once your video is imported drag it on the center to create a new composition layer. It will appear in the center of the screen a new layer will apear called composition in the second column box, right click on the composition layer under the original imported video and the comp settings will appear. When your composition box appears the width value will have a bigger preset to the height change the height to match the width value and click OK.

Once that is done your composition video will appear with black outlines on the top and bottom of the video. Drag your composition layer on to the Render Queue, next to 'Output Module' there is highlighted yellow text click on it and the 'Output Module Setting' will appear click on the 'format' a drop down box will appear and change the format from Quicktime to Targa or a Tiff Sequence.

once that is done click OK as nothing else will be needed to change in this section.

Next to 'Output to' again will be highlighted yellow text click on it and it should show 'Sequence 01_[#####].targa' or tiff depending on the format you have choosen. After clicking on the highlighted text in the 'Save as Box' 'Sequence 01_[#####]' will appear change it to 'Sequence 01.[#####] for coding purposes make sure this change is not missed.

Now select or create a box of where your image sequence will save to then click OK.

Once completing all previous steps click render, once completed close After Effects.

Open Maya.

Click On 'Create' scroll down to 'polygon primitives' were a drop down box will appear and click 'plane' and it will create a flat square in the center of your grid.

Press 'R' on your keyboard and you will see a scaling icon appear put your cursor on the yellow square drag outwards to scale the size bigger.

Once adjusting your size of your plane, on the far right you have a 'channel box/layer editor' in the box you have 'polyplane 1' click on this and change your subdavisions width and height default setting from 10 to 1.

In the 'channel box/layer editor' click on the 'Rotate X' box and type in 90 your plane should now be facing upwards to the screen.

Now press 'W' for the move tool drag the arrow what is facing up and position your plane on top of the grid.

Now we need to get the the iamges in to maya by creating a texture layer on the plane. Click on 'Window' scroll down to were it say's 'Rendering Editors' and a drop down box will appear look for 'Hypershade' and click on it.

The 'Hypershade' should be open and down the left hand side you will see a list of texture's find were it says 'Lambert' and click on it.

The 'Lambert' texture will appear in your 'Work Area'.

Double Click on the 'Lambert' and on the right hand side of your screen your 'Attribute Editor' should appear in this editor you have a option called 'Common Material Attributes' click on the little box highlighted in black next to the option called 'colour'. A layer box will appear called 'Create Render Node' find 'file' and double click.

Once you have completed the last step in 'Hypershade' your 'Work Area' will now have three textures in there position them with 'File' in the middle click on this texture and again on the right hand side the 'Attribute Editor' will open in there will be a section named 'File Attributes' you should see 'Image Name' click on the folder on the far right side this is how you import your images in as a texture.
 After clicking the folder it will open your desktop, find your folder of were you image sequence was saved to and click on the first image and click 'Open'.
 Now your image should appear inside the 'File' layer


 Now Import your 3D character into maya and start rotoscoping in 3D.


Click on 'File', in the 'Attribute Editor' go to 'File Attributes' scroll down to 'Image name' underneath you will see 3 boxs on will be labeled 'Use Image Sequence' click this box.

Now this will allow your images to play as a movie file through a image sequence on your plane when you move along your time line to help you rotoscope in 3D.


This conculdes how to rotoscop in 3D. Make sure you convert your video file in to a Tiff or Targa Sequence and make sure your output name is 'TheTitle.[#####].targa or tiff'. When you have opened Maya you create a plane and put a 'Lambert' texture on the plane in 'Hypershade' when you select a texture layer make sure you choose 'File' click of the folder and select the image sequence and open in. Once you have completed all of this make sure you click the box labeled 'Use Image Sequence' import your 3D character and start keyframing step by step to create your rotoscope in 3D. I hope this has been helpful and good luck on your attempt.
Thursday, 24 March 2011
Toon Boom Studio/After Effects
Here i Will Show You Step By Step My Process of rotoscoping in 2D


 Left Click and you will see a option box scroll down to import and click file.


So this concludes how to get started in Rotoscoping in a 2D software Toon Boom I hope this helps always remember to convert your video first in After Effects into Targa or Tiff Sequence then Add a image Column before importing the image sequence into Toon Boom to start rotoscoping, also remember to 'Turn AutoLight Table' off to see the image you are Rotoscoping over.

Open Up After Effects

Take your mouse cursor to the box area under project on the left hand side.


Once your option box appears find your video you will be using to rotoscop click on it and your video will appear.

Drag Your Video in to the composition area and a new composition layer will be created left click the layer and select composition settings. This will display options to alter the video name and the video size ect if needed.

The video size option will naturally show width bigger than the height change the number of the height to the same number as the width and click OK.

Now your video display will be smaller with a black frame on the top and bottom of the composition

On your bottom left of After Effects there is a sequence column next to it will read 'Render Queue' click on it and now drag the video composition layer into the open area under the name 'Render Queue' and should display with default settings.

Click on were it says lossless and your 'Output Module Settings' will appear click on format and a drop box will appear scroll down and you will see Targa Sequence and Tiff Sequence click either of these and then click OK.

Next to the 'Output To' icon click on the file name displayed next to it highlighted in yellow text 'Output Movie To' box will appear this is were you set up or set your movie image sequence to be transfer to once you have chose the location of your folder click OK.

After your render has finished locate your files and they should be looking something like the example in the box above.

Open up Toon Boom Studio.

Create a new Toon Boom file type in the name of what you would call your file you can change the frame rate and camera size but i left it on default and my format was set to custom.

After finallising your settings the home screen will appear were we will be taking a first steps to creating the rotoscope technique through 2D.

Firstly click and hold on to the second tool bar icon an select what you will be using to draw with out of a brush and pencil, there are also shapes you could use but is not relavant to what we will be doing. i choose to use a pencil.

After deciding what tool you will be drawing with you must get your images into Toon Boom first before importing you must create a section to place your images. In the 'Exposure sheet' you have a drop down box named 'Drawing' this is were you will see the numbers of all the drawings you will do in the grey area next to it right click on the mouse and a option icon will appear, you see the 'Add' put your cursor on the area of the arrow were another drop down of options will appear.

Click on Images and you should now have two icons named 'Drawing' and 'Images'.

Now to import images right click on any of the 'Image' boxes below and drop down will appear at the top you have 'Import images' drag your cursor to were it says this and another drop down will appear click on 'From File'.

After clicking 'From file' it will open up your computer finder this is now were you find the folder were you sent your Tiff or Targa Sequence previously rendered from After Effects once found highlight all the images you are planning to use and click 'Open'.

After clicking open, your images will appear for you to start rotoscoping over them.

Click in the first box of your 'Drawing' coloum and direct your pencil or brush and start 'Rotoscoping'.

Here i have a example of a fully Rotoscoped image, above the top there are fuctions there what can come in handy when using Toon Boom. Above you can see a drop down has appeared after holding the button named 'Show Previous' this function is as striaight forward as the name, it basically shows you a faint outline of your previous sketches you have completed.

Here is an example of the function 'Show Previous' i clicked on the maximum number what is three so above it will display three light sketches of previous drawings highlighted in a light pink. The darker the shade represents the last sketch.

'Turn AutoLight Table' this enable's you to turn on and off the light to view the image this is another handy function Toon Boom has. Right now the light is on so you will only see the solid structure of your drawing.

But when the light is off you can see the image, i tend to think of it as a computer light board.

'Turn AutoLight Table' off to return to rotoscoping view


Subscribe to:
Comments (Atom)