Open After Effects
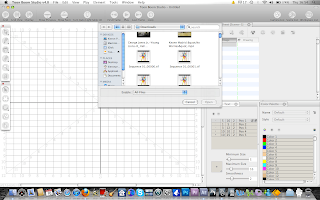
Click on 'File' scroll down to were it say's 'Import' another drop down box will appear go across and click 'File' it will open your files find you video and click on the video then press 'Open'.
Click on 'File' scroll down to were it say's 'Import' another drop down box will appear go across and click 'File' it will open your files find you video and click on the video then press 'Open'.
You should now see your video has been Imported.
Once your video is imported drag it on the center to create a new composition layer. It will appear in the center of the screen a new layer will apear called composition in the second column box, right click on the composition layer under the original imported video and the comp settings will appear. When your composition box appears the width value will have a bigger preset to the height change the height to match the width value and click OK.
Once that is done your composition video will appear with black outlines on the top and bottom of the video. Drag your composition layer on to the Render Queue, next to 'Output Module' there is highlighted yellow text click on it and the 'Output Module Setting' will appear click on the 'format' a drop down box will appear and change the format from Quicktime to Targa or a Tiff Sequence.
once that is done click OK as nothing else will be needed to change in this section.
Next to 'Output to' again will be highlighted yellow text click on it and it should show 'Sequence 01_[#####].targa' or tiff depending on the format you have choosen. After clicking on the highlighted text in the 'Save as Box' 'Sequence 01_[#####]' will appear change it to 'Sequence 01.[#####] for coding purposes make sure this change is not missed.
Now select or create a box of where your image sequence will save to then click OK.
Once completing all previous steps click render, once completed close After Effects.
Open Maya.
Click On 'Create' scroll down to 'polygon primitives' were a drop down box will appear and click 'plane' and it will create a flat square in the center of your grid.
Press 'R' on your keyboard and you will see a scaling icon appear put your cursor on the yellow square drag outwards to scale the size bigger.
Once adjusting your size of your plane, on the far right you have a 'channel box/layer editor' in the box you have 'polyplane 1' click on this and change your subdavisions width and height default setting from 10 to 1.
In the 'channel box/layer editor' click on the 'Rotate X' box and type in 90 your plane should now be facing upwards to the screen.
Now press 'W' for the move tool drag the arrow what is facing up and position your plane on top of the grid.
Now we need to get the the iamges in to maya by creating a texture layer on the plane. Click on 'Window' scroll down to were it say's 'Rendering Editors' and a drop down box will appear look for 'Hypershade' and click on it.
The 'Hypershade' should be open and down the left hand side you will see a list of texture's find were it says 'Lambert' and click on it.
The 'Lambert' texture will appear in your 'Work Area'.
Double Click on the 'Lambert' and on the right hand side of your screen your 'Attribute Editor' should appear in this editor you have a option called 'Common Material Attributes' click on the little box highlighted in black next to the option called 'colour'. A layer box will appear called 'Create Render Node' find 'file' and double click.
Once you have completed the last step in 'Hypershade' your 'Work Area' will now have three textures in there position them with 'File' in the middle click on this texture and again on the right hand side the 'Attribute Editor' will open in there will be a section named 'File Attributes' you should see 'Image Name' click on the folder on the far right side this is how you import your images in as a texture.
After clicking the folder it will open your desktop, find your folder of were you image sequence was saved to and click on the first image and click 'Open'.
Now your image should appear inside the 'File' layer
After clicking the folder it will open your desktop, find your folder of were you image sequence was saved to and click on the first image and click 'Open'.
Now your image should appear inside the 'File' layer
Click on 'File', in the 'Attribute Editor' go to 'File Attributes' scroll down to 'Image name' underneath you will see 3 boxs on will be labeled 'Use Image Sequence' click this box.
Now this will allow your images to play as a movie file through a image sequence on your plane when you move along your time line to help you rotoscope in 3D.
Now Import your 3D character into maya and start rotoscoping in 3D.This conculdes how to rotoscop in 3D. Make sure you convert your video file in to a Tiff or Targa Sequence and make sure your output name is 'TheTitle.[#####].targa or tiff'. When you have opened Maya you create a plane and put a 'Lambert' texture on the plane in 'Hypershade' when you select a texture layer make sure you choose 'File' click of the folder and select the image sequence and open in. Once you have completed all of this make sure you click the box labeled 'Use Image Sequence' import your 3D character and start keyframing step by step to create your rotoscope in 3D. I hope this has been helpful and good luck on your attempt.


